Apr 13, 2010
Roasted Chicken with Sage, Celery and Blood Orange
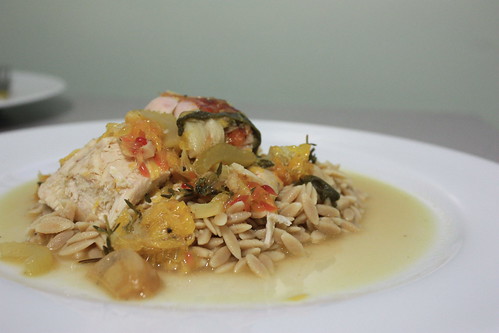
For my first foray in to The Naked Chef I turned to this lovely recipe. Though the original recipe called for guinea fowl, I decided to use a more easily found bird on this side of the pond, chicken. Also, by making up a whole 5 pound chicken I easily had enough for leftovers of the original recipe for two of us, and we used the rest of the meat in chicken tacos later in the week.
What originally caught my eye about this recipe was the blood oranges. Though spring vegetables and fruit are becoming more readily found out here on the West coast, I know for most folks in the northern hemisphere citrus and root veggies are still most prevalent in the markets. The blood oranges become the base of the stuffing and gravy, making the whole dish full of citrus flavors and the chicken super moist. We spooned it over orzo the first night and quinoa the second to make a lovely 2-pot meal.
Roasted Chicken with Sage, Celery and Blood Orange
adapted from The Naked Chef
one 5 lb chicken
6 blood oranges
1 cup chopped celery
1 small handful of fresh thyme*
sea salt and freshly ground pepper
1 tablespoon olive oil
6 cloves of garlic, whole and unpeeled
6 tablespoons butter
10 fresh sage leaves
1 1/2 cups dry white wine
Preheat the oven to 425 degrees F. Remove anything inside the cavity of the chicken. Wash thoroughly inside and out and pat dry with paper towels. Rub the cavity with a little salt and rub the outside with salt and pepper. Let the chicken rest while you are preparing the stuffing.
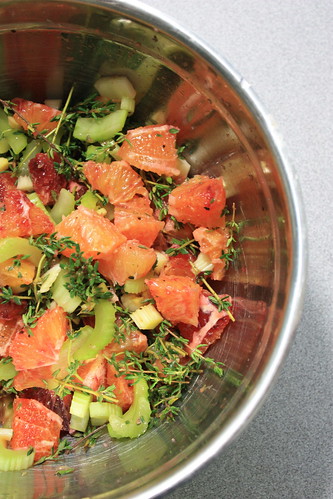
Cut off the ends of the oranges. Stand them on one end and carefully slice off the peel (as close to where the flesh meets the skin as possible). Then slice the oranges into rounds. Combine the orange rounds, chopped celery, thyme, and small pinch of salt and pepper in a bowl and toss. Stuff the cavity of the chicken with this filling, and with any excess stuff underneath the skin (right next to the breast). Pull the drumsticks together at the base of the bird and tightly tie up with cooking string.
Heat a thick-bottomed pan and add the olive oil and the chicken. Cook until lightly golden on all sides, then add the garlic, butter and sage and cook for 3-4 minutes until golden brown. Add the wine in intervals, keeping the pan moist at all times. Place in the oven for 45-55 minutes, checking every 10-15 minutes to top up the wine as necessary. If the top starts getting to dark, place a tented piece of foil over the bird to slow the cooking process of the top outside skin. The chicken will be roasted and partially steamed.
When cooked (I double tested mine with a meat thermometer), carefully remove from the oven and place upside down on a dish, allowing all the juices and moisture to relax back into the breast for several minutes while you make the gravy.
To make the gravy, first discard the excess fat from the pan and place the pan over gentle heat. Scoop out the stuffing from the cavity of the chicken and add to the pan with about 2/3 cup of wine. As the wine boils stir lightly until the liquid has dissolved. Squash the cooked garlic out of the skins with a spoon (capturing and discarding the skins), and pour any of the juices from the plate that the bird is resting on into the gravy. Simmer and season to taste.
Serve carved chicken on a bed of grains (such as orzo), and pour gravy over the dish.
Stats: Serves 4, with leftovers
Time: About 1.5 hours from start to finish
Seasonal Ingredients: Blood oranges and celery from the farmers' market, local organic chicken
Alison's Notes:
*Be sure to pick the small leaves off the tougher stalks of the thyme, or pull out the sprigs of thyme before making the gravy. I didn't do this and wish I had. The flavor is fine, but when we were eating the chicken we had to pull out the thyme and it would have been more enjoyable to not worry about it.
Posted on
Tuesday, April 13, 2010
Apr 11, 2010
Sunday Picture - Tomatoes + Seedlings Wk 2
I spent most of the afternoon/evening today working with these tomatoes. All 30 pounds of them! Let's just say my freezer has a lot more room in it than it did this morning. With rain in the forecast I decided it would be the perfect day to finally make the sauce I saved all these beauties for. It feels like ages ago when we harvested them last August. When I just couldn't look at another tomato; of course I laugh now, because I can't wait for them to come back. In the mean time the sauce that I made today will have to hold us over for the next 5 or 6 months. I'll be back later in the week with the step-by-step process I used for turning these tomatoes into scrumptious sauce.
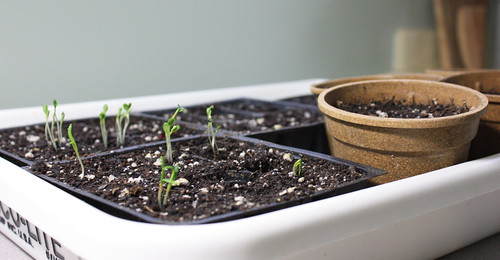
Also, couldn't resist this picture. This week our seedlings literally seemed to jump out of their pods. It felt like overnight we went from having them just barely creeping above the surface of the soil, to standing tall and reaching for the sun. Watching the constant changes and growth makes me very happy!
Finally, I wanted to bring up the cookbook of the month. I know we are a week in, but I've been cooking out of a new one this month and have a backlog of recipes to share. In honor of Jamie Oliver's show "Food Revolution" and his very inspiring "TED Talk" from February, I decided to cook out of the one book I have of his, The Naked Chef. I've used this cookbook intermittently over the past couple years but never really studied it like I have during the past couple weeks.
happy cooking this week.
alison
Posted on
Sunday, April 11, 2010
Apr 4, 2010
Sunday Picture - New Growth
Here is a first glimpse at our new seedlings. These went in the ground a week ago today and are so amazing to watch. Every day Matt and I check to see what new growth has come up. They are like our new little family. Hopefully this is just the beginning of a flourishing garden for the year.
happy cooking this week!
alison
Posted on
Sunday, April 04, 2010
Apr 1, 2010
Paneer Curry with Peas
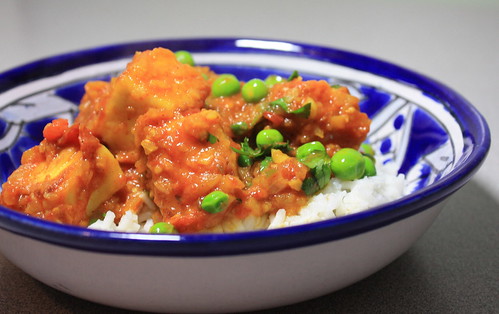
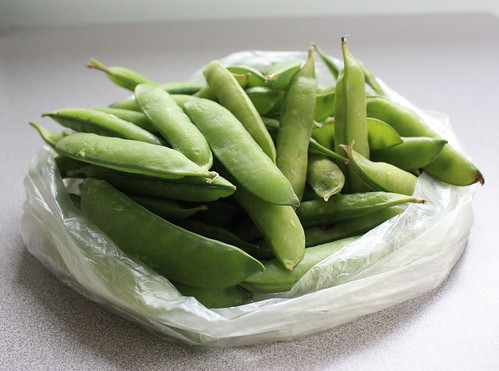
This recipe spoke to me for two reasons. First the peas. For some reason I am lacking recipes that highlights this lovely spring ingredient that is all over the bay area markets these days. And second the paneer. I've had paneer at Indian restaurants, but cooking with this mild Indian cheese had never crossed my mind and I'm always game to try something new.
So before I go any further I must say that I LOVE this recipe!! I want to shout as I type and write in all caps...but I'm holding back...because I don't want to be a shouter. I'm just saying it was fabulous! I know that I will make versions of it again and again just by tweaking the recipe for the season.
The best part (okay, at least I think the best part) is that it tasted like real Indian food, I mean the kind you get at a restaurant. Yes, you too can make restaurant style yummy Indian food.
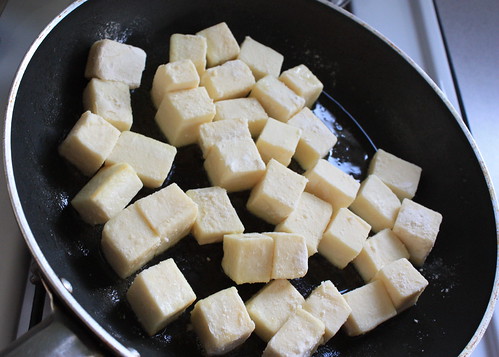
The second best part was the paneer! I might have found a new favorite ingredient. Paneer is a fresh cow's-milk or buffalo's-milk cheese that is in a lot of native Indian dishes. I was so impressed how nicely it held together and how the flavor was not rich like most of the more western cheeses I'm used to. Instead it absorbed the flavor's of the curry nicely and was a good substitute for meat - making it an excellent vegetarian meal.
Have I raved enough? No? Okay, one more thing...if you've ever wanted to try something a little different, or to make your own Indian - this is your dish. That's it, I'm done.
(If you try it let me know what you think, I'd love to hear if I'm crazy or if this really is amazing for anyone else).
Paneer Curry with Peas
adapted from Bon Appetit
2 tablespoons all-purpose flour
1 pound paneer, cut into 1 inch cubes (you could also you firm tofu)
5 tablespoons clarified butter (also called ghee, I found this in the butter section at the grocery)
1 large onion, cut into 1-2 inch pieces
1 teaspoon cumin seeds
2 tablespoons fresh ginger, peeled and minced
3 garlic cloves, minced
2 teaspoons ground coriander
1 serrano chile, minced with seeds (this added a healthy spice, so if your not a fan of spicy food either take out the seeds or use less chile)
1 28-ounce can crushed tomatoes with added puree (I used a quart of tomatoes I canned last fall)
1teaspoon turmeric
1 3/4 cups shelled fresh peas from about 1 3/4 pounds fresh peas in pods (frozen peas that are thawed would also work)
1 teaspoon garam masala
1/4 cup chopped fresh cilantro
Steamed rice
Place flour in a medium - to - large bowl (go bigger rather than smaller here). Add paneer to bowl, toss well to coat with flour. Heat 2 tablespoons clarified butter to heavy large nonstick skillet over medium-high heat. Shake excess flour from paneer; add to skillet and cook until browned in spots, stirring to toss. This should take about 5-7 minutes. Using a slotted spoon, transfer paneer to plate and set aside.
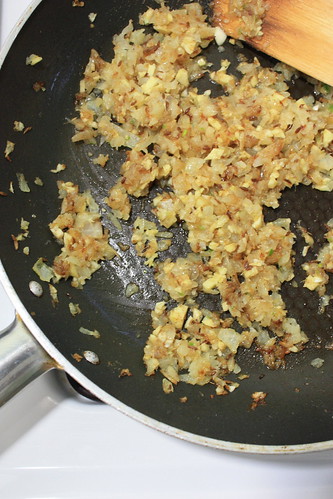
Place onion pieces in processor. Pulse until finely chopped but not watery. Heat remaining 3 tablespoons clarified butter in the skillet used for the paneer over medium heat. Add cumin seeds and stir until aromatic (careful not to burn these, it doesn't take very long). Add chopped onion and cook until beginning to brown, stirring often, about 10 minutes. Add ginger, garlic, coriander and chile; stir 1 minute. (Note: This is the base of your dish, it bring immense flavor so try not to skimp or change the ingredients from the onion to the chilie.) Add crushed tomatoes and turmeric; bring to a simmer. Reduce heat to medium low; cover and simmer until mixture thickens slightly and flavors come together, stirring occasionally.
If serving with steamed rice I would start it here. I used white jasmine rice and it only took about 15-20 minutes to cook. If your rice takes longer be sure to begin the rice earlier so that everything comes together pretty close to the same time.
After about 15-20 minutes, once the mix has begun to thicken, add the peas and cooked paneer; folding into the curry to fully incorporate. Cook mixture over medium heat until peas are tender and paneer is heated through, stirring slowly every couple minutes. Fold in garam masala and cilantro. Season to taste with salt and pepper.
To serve, scoop rice into a bowl and top with curry being sure to incorporate paneer, sauce and peas in the bowl.
Stats: Serves 4 as a main dish...with enough for seconds or leftovers
Time: Probably took an hour start to finish.
Seasonal Ingredients: English Peas and cilantro
happy cooking.
alison
Posted on
Thursday, April 01, 2010
Subscribe to:
Posts (Atom)