Mar 29, 2010

Sunday Picture - Carrot Cake w/ Vanilla Frosting


The Sunday Pic on Monday...I know, I know. To make a long story short just as I was getting ready to post this lovely cake yesterday I lost my internet connection...until about 10 minutes ago. So here we are. I made this cake for a friend's birthday celebration over the weekend. 


Mind you this is exactly my 2nd tiered cake ever and the first was a 3 layers with green icing, lets just say I went BIG.  But this one needed to not only taste good but also be pretty.  Thankfully I have a lovely pastry chef friend who gave me an icing lesson that helped immensely.  The recipe for this Carrot Cake beauty was pulled from one of my favorite food blogs, Smitten Kitchen.  Although instead of making a maple syrup frosting as her recipe suggests, I used this vanilla one. 


I'll definitely hold on to this recipe as it is amazing! In fact I'm eating the last little piece of it now.


happy cooking this week! 
alison

Mar 25, 2010

Moroccan Carrot Soup


One of my favorite times of the week is when I sit down on the weekend and plan out what we're eating for the next 7 days.  During the week breakfast and lunch are pretty standard, but dinner and dessert I can do whatever.  It's so freeing and fun.

Last weekend when I sat down to plan I had my newly arrived Bon Appetit in hand.  I've definitely been enjoying cooking from The Art of Simple Food, but it was nice to have something fresh and new, and April's issue is full of great recipes.  One that caught my eye right away was this Moroccan Carrot Soup.  There is something about carrot soup that sounds just a bit intriguing, and I loved the idea of branching out beyond the flavor palate we've been enjoying lately to try a Moroccan inspired dish.


I say it's freeing, but if my exciting ideas are too out of the ordinary I usually have to "sell" the dinner to Matt.  So,  I must admit, when I told him that we were having Moroccan Carrot Soup this week he went "blah" and made a disgusted look on his face.  To sweeten the deal I mentioned adding sausage on the side and although that sounded better I think deep down he was still skeptical.

The soup came together wonderfully.  And it has a rich flavor and creamy texture that would make me wonder if the base really was carrots if I didn't know better.  That is until you looked at it, what a beautiful vibrant orange!  Really, I don't have a bias to orange food (see here or here)...its just that time of year.


Also it was an easy weeknight meal and paired with local sausage from the market and homemade biscuits it was a dinner even the skeptic wanted more of.

Moroccan Carrot Soup
adapted from Bon Appetit April 2010

2 tablespoons butter (1/4 stick)
1 cup large white onion, chopped (1/2 onion)
1 pound large carrots, peeled and chopped (4 large carrots)
2 1/2 cups chicken broth (I used organic, low-sodium)
1 1/2 teaspoons cumin seeds (optional)
1 tablespoon honey
1 teaspoon fresh lemon juice
pinch of allspice
salt and pepper to taste
1/2 cup plain non-fat yogurt

Melt butter in large saucepan over medium-high heat.  Add chopped onion and saute 2 minutes.  Mix in chopped carrots.  Add broth and bring to boil.  Reduce heat, cover, and simmer until carrots are very tender, 15-20 minutes.

If using, stir cumin seeds in a small skillet over medium-high heat until fragrant; let cool.  Finely grind seeds with mortar and pestle.  Set aside.

Once the carrots are tender, remove soup from the heat and puree in food processor (or blender) in batches until most if it is combined and pureed (a couple larger carrot pieces are okay as they give the soup more texture).  Return to the same pan and over a very low simmer whisk in honey, lemon juice and all spice.  Season with salt and pepper.

Ladle soup into bowls.  Drizzle yogurt over the top and sprinkle generously with freshly ground cumin.  (If your not using the cumin you could try a little pepper, or cinnamon might also be good.  I would start with a small amount and add more as desired.)

Stats: Serves 4
Time: This probably took 45 minutes start to finish, but I also have a super small food processor so had to puree in very small batches.  If you have either a regular or immersion blender it would take about 10 minutes less.
Local Ingredients: I used carrots, onion and honey from local farms.  And the lemon juice was from a lemon in the front yard.

Mar 23, 2010

Chocolate Stout Cupcakes with Frosting


If you have any Guinness left in the house from St. Patty's Day celebrations last week, and you like chocolate and have an inkling for cupcakes then I highly suggest you try these.

I made them exactly a week ago and they will be my go-to St. Patty's Day treats. They were fairly easy for cupcakes, and were a big hit with my fellow revelers after the traditional corned beef and cabbage. Although, shockingly, I've made it 30 years in life and never tried this traditional feast. I'm a little embarrassed to admit that when I said, "we should have this every year" the response was "we do." HA - who knew.


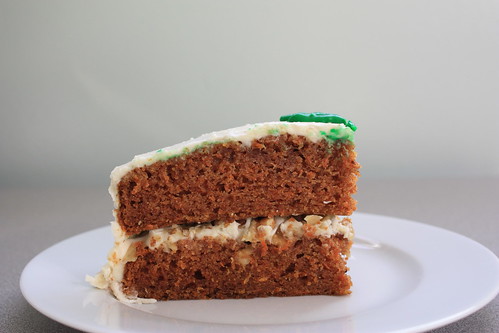
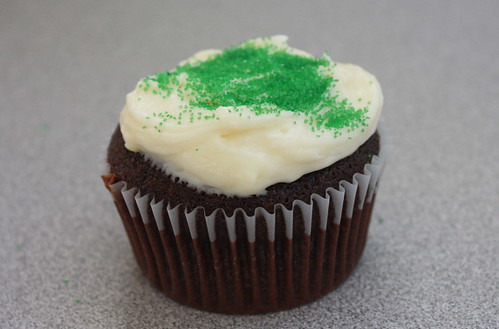
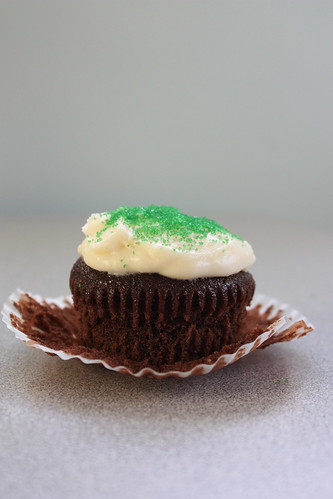
These cupcakes are a bit thicker than normal cakes kind of like gingerbread. The frosting sat nice and creamy on top and was a nice compliment to the denseness of the cake. Though I had them for last weeks "green" holiday, they would also go well with this brisket I made last fall.


Chocolate Stout Cupcakes with Vanilla Cream Cheese Frosting
adapted from this recipe at Pinch My Salt

chocolate stout cupcakes

2 large eggs, at room temperature
1/2 cup plain, non-fat yogurt (full-fat or sour cream would also work, but they would probably be even denser)
6 oz dark stout, at room temperature (I used Guinness)
2 teaspoons vanilla extract
1/2 cup cacao powder (dutch-processed or unsweetened cocoa would probably also work)
1 cup sugar
1 1/4 cups all-purpose flour
1 teaspoon baking soda
1/8 teaspoon ground cinnamon
6 tablespoons melted butter (I used unsalted)

Preheat oven to 350 degrees F and set rack to the center of the oven. Line a cupcake pan with 12 papers and set aside.

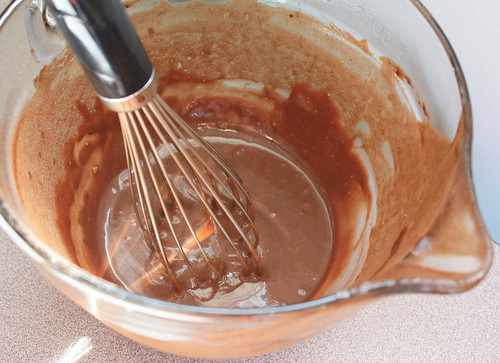
Melt butter and set aside.  In a large bowl, preferably with a pouring spout, whisk together eggs and yogurt.  Add beer and vanilla and whisk until well combined.  In a separate bowl sift together the dry ingredients (cacao powder, sugar, flour, baking soda and cinnamon).  Add about a third of the flour mixture into the wet ingredients and blend well (I whisked by hand, but a hand-mixer would make it much easier). Continue adding a third at a time until the flour mixture is blended into the wet mixture.  Add the butter and mix until well combined.  Pour batter into the 12 cups, filling only about 3/4's full.

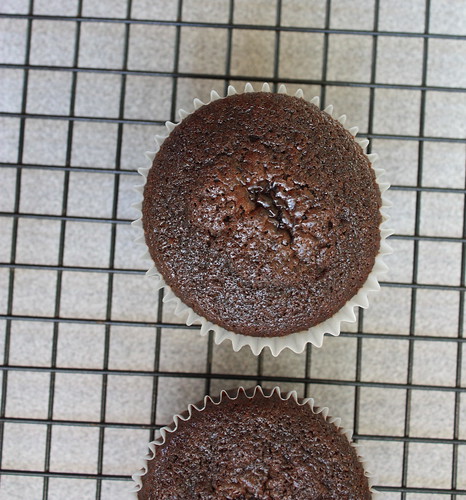
Bake for about 20-30 minutes until the center comes out just barely moist.  The cupcakes will continue to cook in the pan once they are out of the oven.  Place the pan on a wire rack and let cool for 10 minutes.  Remove cupcakes from pan and place on rack until completely cooled.  Wait until cupcakes are cool to frost.

vanilla cream cheese frosting

8 ounces cream cheese, at room temperature
4 tablespoons butter, at room temperature
2 teaspoons vanilla extract
4 cups powdered sugar
green sprinkles (optional)

Using a stand mixer (or hand mixer) blend cream cheese, butter and vanilla until well combined.  Gradually add the powdered sugar, mixing until fully incorporated (I had to scrape down both the sides and the bottom of the bowl several times to combine everything).  Use immediately, or store well-sealed in the refrigerator.  Top with sprinkles.

To frost these cupcakes I used my small cookie dough scoop and dolloped two scoops on top, then using a small off-set spatula I smoothed out the frosting to fully cover the top of the cupcakes and topped with sprinkles.


Stats: 16 cupcakes, and frosting for at least that many plus more.
Time: This took about an hour and half with maybe a bit more in cooling time, but over all it came together easily. The batter can be stored for several days before making along with the frosting.  The frosting should be room temperature when frosting the cupcakes. 
Seasonal Ingredients: Unfortunately none to speak of...oh that's sad.  I'll have to make sure my next dessert has something seasonal.

Mar 21, 2010

Sunday Picture - Chocolate Salon


On Saturday Matt and I checked out the 3rd Annual Chocolate Salon in San Francisco.  It was much bigger than I imagined with chocolate galore, and all for tasting.  We quickly learned that we had to pace ourselves, but I still had enough chocolate to last me at least a couple days.  Here are several photos from the event.  It was so fun to try everything, and see businesses small and large showing off their goods. I was truly inspired by all the creativity and wonderful tastes I got to try. 


Back tomorrow with a recipe...
alison

Mar 15, 2010

Long-Cooked Broccoli


You know how sometimes you find those easy meals that are almost too good to be true. Well this is one of them. I found this easy broccoli recipe in the fabulous cook book I'm working from this month. I swear, every single recipe is amazing! I guess I should have expected that, being that it is Alice Waters cookbook, but still.


So, back to the broccoli. I must say I have a love-hate relationship with broccoli. I feel like I should love it raw and crunchy, but I just don't - it must be cooked for me to enjoy. Which is why this recipe is so perfect. And it's easy, making it a perfect weeknight meal. So for anyone who can find broccoli in the stores check this out, and for the rest of you please come find this recipe when your broccoli is in season, I know you won't be disappointed.


I paired the broccoli with whole-wheat pasta and a few toasted slices of baguette on the side. When it was finished cooking, the broccoli was tender and juicy and basically fell apart, making it the perfect pasta "sauce."

Long-Cooked Broccoli with Pasta
adapted from The Art of Simple Food

1 1/2 pounds of broccoli
6 tablespoons olive oil
6 cloves of garlic
1/4 teaspoon dried chile flakes (optional)
salt
1 cup broth (I used chicken broth, vegetable broth or water could also be used)
1 lemon, juiced
1/2 pound pasta (I used whole-wheat spaghetti)
Parmesan cheese as desired

Thoroughly wash the broccoli florets and cut off the dry end of the stems. Peel the rest of the stems and divide or chop the florets into small pieces. Heat the oil in a large frying pan over medium heat. Peel and thinly slice the garlic. Add the broccoli, garlic, chile flakes and a pinch of salt to the pan. Cook for a few minutes, stirring occasionally.

Add 1 cup of broth and bring to a boil. Lower the heat to a simmer, cover the pot tightly and cook until very tender, about 45 minutes to 1 hour. Add more broth if the broccoli starts to dry out, continue to stir occasionally.

After the broccoli has cooked for about 30 minutes cook your pasta in a pot of heavily salted boiling water. Drain well.

When the broccoli is very tender (basically falling apart) stir in the lemon juice. Put it together placing the pasta in a bowl then grating a little fresh Parmesan cheese on the pasta. Top with the cooked broccoli. Taste for seasoning and add lemon juice, salt or oil as needed. Final sprinkle with a touch more cheese.

Stats: serves 4.
Time: this took just over an hour from start to finish, but most of the time the broccoli was cooking so I wasn't standing over the stove the whole time.
Seasonal ingredients: I used California broccoli florets, a lemon from the neighbors tree, and garlic cloves from the farm last summer.

happy healthy cooking,
Alison

Mar 14, 2010

Sunday Picture - Homemade Croissants


Today I'm just posting an inspirational picture.  Though some might look at this and think, oh that looks like a picture of croissants; to them I say, yes - isn't it grand!  I know, I'm kinda crazy about this sort of thing...but it was my first attempt at making croissants, and I'm so excited I just had to share.

I'm sure everyone has a recipe or idea that they want to try but are to overwhelmed to even go down that path, however, I'm here to tell you it is so worth the effort.  I've been wanting to make croissants from scratch for a long time, but I've always been turned off by the four (yes, really!!) pages of directions in the Tartine Bakery cookbook.  It was wonderful to share these with friends over brunch this morning, and the satisfaction of conquering the recipe was just an added bonus.  

I'll be back tomorrow with a recipe for Long-Cooked Broccoli.

happy cooking this week,
Alison

Mar 9, 2010

wok-fried salted chili crab


About a month ago my Aunt was visiting from Omaha.  She loves crab, and so I decided to take advantage of her visit to try a seafood recipe I had been looking at all month.  Not sure if I've said this before, but Matt is not a fish eater, so I never almost never make any kind of seafood.  I however, love it!  So if we go out and I'm not in a sharing mood I get seafood, knowing that I'll get the whole dinner to myself (a little selfish...what can I say). 

Anyways, when my Aunt came to visit we made this tasty crab together (and I got Matt a New York strip).  You'll laugh because though it is "chili" crab, I accidentally got little Serrano chili's and so we had the most itty bitty piece you can imagine because we just couldn't fathom anything more.  If you like spice, or you get a less spicy chili, then you might be able to handle more then the tiny piece in the picture below (seriously, all we could add was the little piece on the right; yes, the one that's hard to see).


The crab though came out wonderfully, and while I like it with butter and pasta too, this tasted like a healthier (i.e. less buttery) way to enjoy it.  Also, I learned a trick for cleaning.  I actually asked the butcher to clean it.  No problem!  I couldn't believe it, all we had to do was cook it up, no cleaning required.  Definitely something to remember the next time your in the mood for some crab.


wok-fried salted chili crab
adapted from The New Cook

2 uncooked crabs (pre-cleaned if possible)
2 tablespoons vegetable oil
1 small Serrano chili (or a less spicy red chili)
sea salt
cracked black pepper
lime wedges

Remove the limbs and claws from the body of the crabs.  (If not pre-cleaned, cut the body in half and clean well).  Heat a wok or frying pan over high heat.  Add the oil, chillies, and about a teaspoon each of salt and pepper.  Cook for 1 minute.  Add the crab pieces and stir-fry for 5-7 minutes or until the shells change color and the flesh is white and tender (it becomes a really pretty redish orange color).

Serve the crabs with lime wedges and eat with your fingers.  (cookbook note: if the crab claws are large, lightly steam them before adding them to the spices in the wok).

stats: serves 2 (easily can be doubled depending on your needs), took 30 minutes or less (especially because I got help with cleaning the crab from my butcher)


Have you ever made crab?  What's your favorite way to make it?

Happy Wednesday,
Alison

Mar 2, 2010

asparagus and lemon risotto


Do you know that spring is finally here? It might not feel like it with all the rain we've been having here in California, but when the asparagus is ready it feels like spring.  (My apologies to those with snow still on the ground - yours is coming. And when it does, come find this recipe; it's worth it!)


As I continue to push myself to eat locally and seasonally I am more and more surprised at how I feel the ebb and flow of the food I eat.  I remember back in August when I couldn't eat one more fresh tomato, and now I think how was that possible? Oh how I long for fresh fruity tomatoes straight from the garden.  But isn't this mother nature's sweet way.  So now as we come out of winter I've been waiting for asparagus to arrive and I'm sure I let out a little yelp of joy when the thin green stalks finally appeared at the market last week.


This tasty hearty risotto highlighting the asparagus and lemon's that are fresh right now, seemed like the perfect way to kick off my first "spring" meal.  I don't think I realized how much I missed this sweet vegetable; I had it on pizza last night, and have more in-waiting for later this week.  Oh asparagus, how I adore thee. 


recipe for asparagus and lemon risotto
adapted from the cookbook of the month...

1 lb thin-speared asparagus
1 lemon
3 T butter
1 small onion finely diced
1 1/2 cups risotto rice (I used Arborio, and find this is easy to find in most markets)
5 cups chicken broth (if your making a vegetarian version use vegetable broth)
1/2 cup dry white wine
1/3 cup grated Parmesan cheese

Thoroughly wash the asparagus and cut off the tough end, chop into half-inch pieces and set aside.  Zest the lemon into a bowl and set aside.  Juice the lemon and save juice in a separate bowl.

Melt 2 tablespoons of butter in a heavy bottomed sauce pan.  Once the butter is melted add the diced onion.  Cook until the onion is soft and translucent, about 8-10 minutes.  Add the rice and stir to coat; cook until translucent, about 4 minutes.  Be careful to not let it brown.  While the onion and rice are cooking bring the broth to a boil then turn it off.

Stir the lemon zest into the sauteed rice and pour in the wine.  Cook the rice mix until all the wine is absorbed, be sure to stir fairly often.  Add 1 cup of the warm chicken broth and cook at a simmer, stirring occasionally.  When the rice starts to get thick, pur in another 1/2 cup of the broth and add some salt (be careful not to add to much, go lighter at this point, you can always add more later).  Keep adding broth, 1/2 cup at a time, every time the rice thickens and the broth is cooked down.  Do not let it dry out.  After half the broth is added stir in the cut asparagus.  Cook until the rice is tender but still has a firm core, 20-30 minutes.

When the rice is almost done stir in half of the lemon juice, 1 tablespoon of butter and the grated cheese.  Stir vigorously to develop a creamy starch.  Taste for salt and lemon juice and add more as needed.  Turn off the head and let the risotto sit uncovered for 2 minutes, serve hot.

stats: this will serve 4 nicely for a meal, and took about an hour start to finish

happy beginning of spring,
alison